Showing posts with label recipe. Show all posts

Wednesday, March 12, 2025

G is for Gingerbread Chicken. Really.

Yep, that says Gingerbread Chicken. Let’s all just be thankful it’s not Chicken Gingerbread.

This is an adaptation of an adaptation of a 14th century recipe mixed with a 15th century recipe. To find out what possessed me to do this, check out this post.

Here's how it looked on my plate. (Ignore the sad veg mix in the background.)

RECIPE FIRST, ESSAY SECOND

Gingerbread Chicken aka Lombardy Chicken

1/4 cup fresh parsley 

3 TBsp red wine vinegar

1/2 lb boneless skinless chicken thighs

1 cup chicken broth

1 tsp red sandalwood

1/4 tsp ground white pepper

1/2 tsp cinnamon

1/4 tsp salt

1/2 gingerbread recipe, crumbled ~ 1/4 cup https://alphatestkitchen.blogspot.com/2024/02/g-is-for-gingerbread-very-very-old.html

1/2 cup soft breadcrumbs

1 egg, beaten

1 TBsp butter

1) Mince parsley. Place it and vinegar in a small microwave safe container. Heat on high 1 minute. Set aside to cool.

2) Place broth and sandalwood, pepper, cinnamon, salt, gingerbread and breadcrumbs into a saucepan. Bring to boil.

3) Cube chicken while waiting for broth to boil.

4) Stir chicken into broth. Reduce heat to low, achieving a slow boil. Cook 10 minutes or until chicken is cooked. Remove from heat.

5) Add beaten egg to parsley mixture. Strain this into chicken and broth, pressing to get as much liquid out of the parsley as possible. Stir well.

6) Return saucepan to very low heat. Add butter. Cook 5 minutes, stirring frequently, until mixture thickens.

Previously on What to Do With This Leftover 14th/15th Century Gingerbread?, I was debating whether to make the chicken recipe that had the gingerbread as an ingredient. I don’t generally think of sweet and meat as a happy combination. HOWEVER, I cajoled myself into it by pointing out that my go-to order at a Chinese restaurant is Sweet and Sour Chicken. Was this really all that different conceptually? No! 

The vinegar and parsley mixture.

Chicken and broth before adding the thickening stuff.

Chicken and broth after The Thickening. Not gonna lie, I kinda love that it's pink.

I was curious about why this was called “Lombardy Chicken.” Sadly, after conferring with Research Assistant Google, I remain in the dark. (Which I guess is appropriate given the time period (ha ha…sorry, i’ll show myself out).) Apparently, Olive Garden had a popular seasonal dish with the same name, and that is mostly what internet searches turn up these days. The Olive Garden version seems to be a sort of cheesy chicken marsala. I honestly am surprised I don’t remember this dish; I used to eat at Olive Garden quite a bit back in the day, and this absolutely sounds like my cup of tea. HOWEVER, it is definitely not that same thing I was making here. 

I found only one modern blog reference to a similar sounding Lombardy Chicken recipe, and it did not give any explanation for the name. I have a guess, and no support for it: the Lombardy flag back in the day had a red cross. Red cross, red dish? Maybe!

(Apropos of nothing, looks like I made this on Super Bowl Sunday Feb 11, 2024. Sooooo, Lombardi trophy/Lombardy chicken? Yeaaah, that’s a stretch.)

Where did this recipe come from? Welp, I have a cookbook called Ye Bors Hede Boke of Cookry (which is super fun if you’ve ever been interested in cooking medieval English recipes). They created their Lombardy Chicken recipe by combining two recipes; one from a 14th century book called Ancient Cookery, and the other from a 15th century recipe from “For the knights’ and kings’ tables” (BL MS Sloane 442). So that was my starting point.

This recipe being “for the knights’ and kins’ tables,” probably indicates that someone like me wouldn’t have been making this for my own dinner table back in the day. Also, while I was poking around on the internet before writing this, I found that someone in Norway had done their Masters’ thesis about “For the knights’ and kings’ tables” (BL MS Sloane 442), which engendered massive food history nerd excitement! I have not managed to dig into it yet, but I did download it and am looking forward to diving in at some point. Perhaps someday I will randomly email the person that wrote it with a question or twelve. That’d probably bemuse the heck out of them.

Pedantic Aside: the original recipe title is “Bruet of Lombardye,” which translates to “Broth of Lombardy,” not “Lombardy Chicken.” One of the OG recipes is much more flex on the meat choice, suggesting hens, chickens, rabbits "...or other good flesh..." I actually kind of appreciate this approach.

So what did I change? First off, I halved the recipe I was following, both because I was feeling a little unsure about it, and because I had already used half of my gingerbread recipe as a dessert. I also went with chicken thighs instead of breasts because I find them more forgiving of cooking errors. (Thank you Food Network.) The white pepper is another of my twists on the original. That’s a personal preference thing.

And obviously, the original recipe didn’t involve a microwave, so cooking the parsley and vinegar that way was my being lazy, or efficient, depending on what kind of mood you’re in ;) 

Overall I would say the dish turned out great. It was delicious and waaay less weird to my palate than I had feared. Will I ever make it again? Ehn, probably not without A Reason. It’s a bit too complicated, ingredient-wise, to become part of my weeknight dinner rotation. But I’m definitely glad I goaded myself into making it at least once, especially since this whole cooking ancient gingerbread idea has been living in my brain for so long. And it did not ruin dinner in the slightest. Not a ringing endorsement, perhaps, but hopefully good enough to inspire me to continue trying this stuff out whenever the mood strikes.


Wednesday, February 14, 2024

G is for Gingerbread. Very Very Old Gingerbread


Spoiler Alert: here's how it turned out!

Ok, it's not the gingerbread that's old, it's the recipe. this is an adaptation of an adaptation of a 14th or 15th century gingerbread recipe.

to find out what possessed me to do this, check out this post.


RECIPE FIRST, ESSAY SECOND


2-3 slices of bread to make 1 cup soft breadcrumbs

1/4 cup honey

1 tsp ground ginger

1/4 tsp red sandlewood

1/4 tsp ground white pepper

pinch of nutmeg

pinch of cardamom


1) cut the crusts from 2-3 slices of bread. chop/tear the bread into small pieces.


2) put honey in small saucepan and bring to a boil. I did this on medium heat.


3) add breadcrumbs to the honey, lower the heat, and stir and squish until the crumbs are “dissolved.” 


4) remove from heat and stir in the spices.


5) dump out onto a kneading surface and let cool until safe to handle.


6) knead until the constancy of marzipan (or playdough). 


6.5) if making as a dessert, divide into several bite size balls and roll those in sugar. 


7) cool completely.


i’ve got to admit, when i first read this recipe i was a little confused and not terribly enthused. honestly i think that’s part of what stalled this project for so long. i was afraid i would go to the trouble of making this and find it super gross, thus wasting both time and food. to be fair, the recipe does not seem very “normal” as far as modern baking of gingerbread goes. for instance, there’s no flour. and also, oh hey yeah, there’s no BAKING. however, this year for me has become a sort of Finally Do This Thing or Archive It adventure. so here we are.


Oh look, it's mise en place! thanks Food Network.

I used Oroweat 12 Grain for the breadcrumbs.
3 slices wound up being overkill, but I just added the leftover crumbs (and the crusts) to my breadcrumb bag. I make meatloaf fairly regularly, so they won't go to waste.

Honey is really impressive when it boils, which I should have remembered from watching the Great British Bake Off.

I decided this looked "dissolved" enough for the breadcrumbs.
This part of the process was really more squishing than stirring.

Adding the spices gave this a really pretty color and a lovely smell. Warning that the kneading portion was an extremely sticky undertaking. I thought adding flour would mess things up, so I just went with it. If I make this again, I might try buttering my hands?

And this is how it turned out. The recipe I had actually has you making the gingerbread as part of another dish, but also suggests what you can do to make it more of a dessert. So I decided to go half and half on that and just happened to have some cute multi colored sugar sprinkles to roll the dessert balls in.

I’m happy to share the fact that my fears were not reality. this actually turned out pretty tasty. sweet and full of nice bitey warming spices (suck it, oliver cromwell). based on how it turned out, i feel like our closest modern equivalent might be a cake pop?


(although what this recipe personally reminds me most of is a bizarre snack I used to make for myself when I was a kid. I would take a slice of white bread and tear off the crusts. then I would pour sugar into the middle of the bread and squish the whole thing together until it resembled a large dough ball. it was sweet and delicious and not even remotely good for me, i’m sure. a snack only undertaken when under the unwatchful eye of an inattentive babysitter. sorry mom.) 


so where did this recipe come from? welp, i have a cookbook called Ye Bors Hede Boke of Cookry (which is super fun if you’ve ever been interested in cooking medieval english recipes) and it adapted a gingerbread recipe from a 14th or 15th manuscript, BL MS Sloane 221. interestingly this recipe doesn’t have its own page, but is a footnote to another recipe, a savory chicken dish that calls for the inclusion of gingerbread. i’m debating with myself whether or not i have the gumption to go ahead and make _that_ recipe now that i have some period appropriate gingerbread to hand.


i did some adapting on the recipe because, well, a of all) i’ve yet to encounter the recipe i don’t want to tweak a bit (shrug). but secondly, two of the ingredients called for were not already in my kitchen, and buying spices online winds up being kind of a commitment, due to the amounts. 


The ingredients in question were red sandlewood and long pepper. after reading about them a bit, I decided I was up for getting the red sandlewood (used mostly for color, and also an ingredient in the gingerbread chicken dish that I’m probably totally going to make), but not the long pepper (it’s described as a slightly spicier form of pepper when compared to black and white pepper and i’m unfortunately not into that kind of spice). consulting my dear friend professor google, i decided to approximate the long pepper with what i normally use, white pepper, plus some bonus spices.


overall I'm very glad I did this. it was tasty, and it was super satisfying to finally start this project. not sure i would necessarily make it again? but hey, if I'm ever stuck for a dessert and only have bread and spices, I guess I now have a useful trick up my sleeve.


Friday, December 10, 2010

I is for Iron Foodie, Prequel 3

or E is for Easy Toasted Ravioli

Before I launched into my Iron Foodie recipe, I decided to do a Proof of Concept pre-run (Mythbusters fan, yes).

I'd found plenty of easy-ish looking Toasted Ravioli recipes out on the interwebs, but I had no idea whether or not they would wind up tasting like the real thing.

Hey, what better time to take on a completely untried recipe than Thanksgiving? Oh, just about any time, I would normally say. Since I, however, am an experienced member of The School of Turkey Basting, I wind up with a fair amount of free time in the kitchen on Feast Day. So I jumped in.

What I Did:

1 egg
2 tablespoons heavy whipping cream
1 cup stuffing cubes
1 pumpkin cookie, stale
frying oil
1 package of Spinach and Cheese Ravioli
1 jar of Vodka sauce

1) Use a fork to mix together egg and cream in a shallow bowl.

2) Put the stuffing cubes and cookie into food processor and mix until the cubes are crumbs. Place in a bowl or on a small plate.

3) Fill a skillet with oil for frying (I like to go about 1/2 inch deep. You do what suits you) and warm over medium heat.

4) Dip ravioli in the egg mixture, shake off excess.

5) Dip eggy ravioli in crumbs, shake off excess.

6) Place ravioli in hot oil. Fry 3-4 minutes per side.

7) Pour sauce into a small sauce pain and warm over low heat.

8) Put fried raviolis on a paper towel-lined plate.

9) Serve ravioli with sauce. Eat. Enjoy!

How Did it Go?
Great! I put this out as an appetizer and people devoured and praised it, despite not having ever heard of it before. (Not a lot of St. Louisians on hand here in Seattle.) So, concept proved as far as I was concerned.

What Would I Change?
- I started heating the oil a little late, so the first couple of ravioli weren't as crispy as I would have liked. I wound up adjusting this for my Iron Foodie recipe.
- The cookie crumbs wound up a little too big. They tasted ok, but it threw the texture off a little. (To me. Pretty sure my friends didn't notice/care.)

Friday, December 3, 2010

T is for Toasted Ravioli or I is for Iron Foodie Contest Recipe

Ok, Tech Week almost done, deadline looming, here, finally, is The Recipe.

(Here's Marx Food's Iron Foodie Contest explained, in case you're just now tuning in.)

Toasted Ravioli is a local specialty in my hometown of St. Louis, Missouri and is very hard to find elsewhere. In fact, most people who haven't spent time in StL have never even heard of it. This is their bad luck, because it's very very very good. How good? The only hometown food I miss more is White Castle.

Since, as I mentioned earlier, I was already thinking in an Italian/meat-ward direction, Toasted Ravioli was a most acceptable brain wave. As usual, I hit the internet for some recipe theory research, and found some useful stuff.

In fact, I did a sort of proof of concept experiment as a Thanksgiving appetizer. It was definitely well received. But I decided Iron Foodie deserved no less than true, complete insanity. So, I made mine from scratch. Research debts also in the direction of Cooks dot com and Betty Crocker's New Cookbook (the 1st cookbook I owned as an adult).

What I Did:

~ Pasta ~
1/3 cup of macerated Dulse Seaweed*
2 large eggs
1 TBLSP olive oil
1/2 tsn Smoked Salt*
2+ cups flour

0) Soak the seaweed in boiling water for 15 minutes (this is macerating. big word, simple concept.)

1) Combine eggs, seaweed, oil and salt in a food processor until blended.

2) Put the flour on a decent sized flat surface and create a well in the middle (a sort of volcano shaped thing; the crater is to hold the liquid.)

3) Slowly work the flour into the liquid until completely combined. (This gets messy. No worries.)

4) At this point you will most likely have to adjust your pasta dough. If it is too dry (crumbly, not sticking together, i.e., what happened to me), gradually incorporate little bits of liquid (TBLSP at a time) until you achieve a nice dough consistency. If it is too sticky, gradually incorporate bits of flour.

5) Knead the dough on a lightly floured surface for 5-8 minutes.

6) Plastic wrap the dough and rest in the fridge for several hours.


~ Filling ~
1 cup cubed squash
2 TBLSP olive oil
1 lb. ground pork
1/2 tsp Smoked Salt*
1/2 tsp ground Tellicherry Peppercorns*
1/3 of a medium sized onion, chopped
1/4 cup fresh sage
2 TBLSP fresh parsley
2 cloves garlic, SMASHED!
1/4 cup white wine
1/3 cup macerated Dried Wild Porcini Mushrooms*
1/2 cup cottage cheese

7) Parboil squash

8) Cook oil, pork, salt and pepper in a skillet over medium heat until pork is thoroughly cooked.

9) Add all other Filling ingredients (except cottage cheese) to skillet, cover and reduce heat to low; stir occasionally.


10) Cut one third off of the chilled pasta dough.

11) Roll it through a pasta machine on the widest setting. (If you don't have a pasta machine, use a rolling pin and skip ahead to step 15.)

12) Fold the pasta sheet in on itself from the ends, roughly into thirds. Sprinkle lightly with flour. The idea is to get it to a width where you can turn it 90 degrees and run in through the pasta machine again.

13) Click the pasta machine down one setting and run the pasta sheet through again.

14) Repeat 13 until you get the pasta as thin as you want it. (For me, this takes it down to the narrowest setting. So you can read through the pasta. Your taste may absolutely vary.)

15) Turn the heat off on the filling.

16) Lay the pasta sheet out on waxed paper. Cut pasta circles out of it with an upside down glass. (There are other ravioli cutting methods, but this one best appeals to my innate sense of laziness.)

17) Add filling and cottage cheese to food processor. Pulse for about 20 seconds, until everything is just combined.

18) Spoon small heaps of filling on one pasta circle.

19) Wet the entire edge of the circle (use water, butter, milk, whatever really…..I used the water from macerating the Porcini Mushrooms).


20) Place a second circle on top, and gently press edges together all the way around.
***It's right about here that this becomes the longest recipe I've ever done on this blog. HUZZAH FOR IRON FOODIENESS!***

~ Sauce ~
1 macerated Aji Panca Chili*
1/2 heavy whipping cream
1 clove garlic SMASHED!
1 can tomato sauce
1 tsp oregano
1 tsp basil

21) Slice open the chili and scrape out the seeds and membranes.

22) Chop chili and add it, garlic and cream to a small sauce pan. Warm over low heat.

23) Just as the cream wants to try boiling, turn off the heat.

24) Dump saucepan contents into food processor. Blend until completely mixed.

25) Return sauce to pan. Add tomato sauce, oregano and basil and warm over low heat, stirring occasionally.

~ Toasted…ing…ness…stuff... ~
1 egg
3 TBLSP heavy whipping cream
2 cups stuffing cubes
~ 1/4 cup parmesan cheese, grated
oil for frying

26) Fill a skillet with oil for frying (I like to go about 1/2 inch deep. You do what suits you.) and warm over medium heat.

27) Use a fork to mix together eggs and cream in a bowl.

28) Put the stuffing cubes and cheese into food processor and mix until the cubes are crumbs. Place in a bowl or on a small plate.

29) Dip ravioli in the egg mixture, shake off excess.

30) Dip eggy ravioli in crumbs, shake off excess.

31) Place ravioli in skillet. Fry 3-4 minutes per side.

32) Put fried raviolis on a paper towel-lined plate.

33) Serve ravioli with sauce. Eat. Enjoy!


How Did It Go?
It went surprisingly well, given the large number of new things i was trying (ingredients and techniques), and considering that I've not made scratch ravioli in a long long time. Texture was right on, flavor was pretty nice. Mostly a win here.
Also:
- The seaweed gave a really neat color to the pasta dough.
- The mushrooms rounded out the taste of the pork in a way that surprised me.
- The chili sauce wound up being not too hot for me, which is something of a miracle, frankly. And not being in pain, i was able to appreciate the flavor.

What Would I Do Differently?
- More filling! I put about a teaspoon's worth of filling in each ravioli, which wound up being not quite enough. The pasta to filling ratio was too high, which buried a lot of the flavor of the filling when everything was put together. Lacked balance.

- More vegetables! I think I'd up the butternut squash ratio a bit, just to get more vitamins involved. I mean, since you're eating something fried, it's nice to strike a blow for Stealth Health when you can.

Thursday, November 11, 2010

D is for Duck Liver Pâté

Once upon a time a blogger bought and cooked a duck.

Many moons later she blogged about it.

Two point five moons after that she finally got around to doing something with the duck liver.


Sooooo, I was _planning_ on following this recipe I found on epicurious pretty darn closely. Because making a pâté seemed like a fairly complex undertaking.

However, typically, I didn't have all the ingredients I needed, (FAIL!) so I had to make a couple of substitutions on the fly. (Remind me later to tell you about the time I got halfway through a batch of Toll House Cookies before realizing I was out of eggs. Sigh.)

What I Did:

bacon fat (approx 3 ounces)*
1 shallot
1 duck liver (approx 3 ounces)*
1/4 teaspoon herbes de Provence
1 clove garlic, peeled and crushed
1/4 teaspoon salt
1/4 teaspoon freshly ground black pepper
1 teaspoon sweet vermouth
toast

*I had to guesstimate the amount. Unless the ingredients in question are coming from a can, 'ounces' aren't a recognized unit of measurement in my kitchen. I used an glob of bacon fat that appeared to be about the same size as the liver and crossed my fingers.


1) Place bacon fat in a skillet, and cook over medium heat for 4 to 5 minutes, until the fat melts.

1.5) Chop the shallot, garlic and liver while waiting for the fat to melt.

2) Add the shallot to the fat, cook for about 30 seconds, stirring once or twice.

3) Add the liver, herbes and garlic, and cook over medium heat for two minutes, stirring occasionally.


**This is about when I realized that no part of making the pâté would be visually appealing. It smelled really good, though.

4) Add the salt and pepper. Remove from heat.

5) Throw everything into the food processor, add the vermouth, and blend until liquefied.

6) Cool in the fridge for about 30 minutes. Make toast during the end of this time.

How Did it Go?
Not too bad. Yeah, I think I can say that. It wasn't a pretty food, but it was definitely yummy. (Maybe this is where I should mention that I like braunschwager, just to give you a reference point for my taste.) It was probably a bit flat compared to Professional Pâtés, but I'm working from memory here, so I can't say for certain sure what the difference was.


What Would I Do Differently?
Where to start? Um…

- The original recipe called for a much longer cooling time. So I'd be interested to see if that was different taste-wise, or was just a texture thing.

- I'll admit that serving this on toasted pre-sliced sandwich loaf felt a little ghetto. If sharing with guests I'd definitely get a schmancier bread involved.

- Given duck livers enough and time, I'd try making several pâtés with several different alcohols. The vermouth was fine, but I find myself wondering about scotch…

Friday, September 17, 2010

Z is for Zucchini Chicken Parmigiana

I love Italian food, but one thing about it puzzles me: You often seem to have to choose between meat and vegetables. Meat Lasagna or Vegetable Lasagna. Chicken Parmigiana or Eggplant Parmigiana. Beef Ravioli or Cheese Ravioli.

I say bollocks to that.

What I Did:

1 medium size zucchini
3 boneless, skinless chicken thighs
1 egg
dash of water
flour (approx 1 cup)
Stove Top stuffing mix (approx 1 cup)
frying oil

1 can of tomato sauce
1 cup of red cooking wine
3 cloves of garlic, smashed or chopped
1 TBSP each of: garlic salt, white pepper, dried basil, dried oregano, olive oil

2 servings of pasta of your choice (I like thin spaghetti, myself)
1 cup of cooking wine

cheese

0) Preheat oven to 375

1) Put about half an inch of frying oil in your favorite frying vessel and warm it over medium heat.

2) Mix the egg and water in a bowl to create the Egg Wash Step in your Breading Station.

2.5) Place the flour and Stove Top crumbs in separate containers (small plates are totally fine for this). This completes the Breading Station.

3) Bread the chicken:
- dip in the egg wash
- shake off excess
- dip in the flour
- shake off excess
- dip back in the egg
- dip in the Stove Top crumbs

4) At this point the oil should be hot enough to fry the chicken. Cook approx. five minutes per side.

5) While the chicken cooks, combine the tomato sauce, wine, garlic and spices in a baking dish large enough to hold all the chicken and zucchini.

6) Drain the fried chicken on a plate covered with a paper towel.

7) Quarter the zucchini and slice off enough of the outside so that they can sit basically flat. Repeat the breading and frying steps with the zucchini.

8) Drain the zucchini briefly on the paper towel plate. Add the chicken and zucchini to the baking dish and place the dish in the oven.

9) Set oven timer for 15 minutes.

10) During baking, start boiling the water (plus 1 cup of cooking wine) for the noodles. When the water is boiling, add the noodles (you know the drill).

11) After 15 minutes of baking, add shredded cheese of your choice to the tops of the chicken and zucchini. (I used Parmesan and American. You should use what you like. It's cheese; very hard to go wrong here.) Put back in the oven for another 5 minutes.

12) Remove dish from oven, drain noodles (this timed out really well for me), put on plates and serve. Nom!

How Did it Go?
I'll repeat my 'Nom!' here. I learned from my previous mistakes and it all worked much better. Crispy outsides to the chicken and zucchini, tender juicy insides.

What Would I Do Differently?
Allegedly there's a method for breading things that keeps your hands from getting gloppy. I have soooooo not mastered this. I've heard the "One hand for the dry ingredients, one hand for the wet ingredients" Principle, but I always get stymied at the point where I'm moving the item to be breaded from a wet dish to a dry dish (or vice versa). One hand inevitably winds up both wet and dry and then i just give it all up for lost. So, that's a skill I'd like to look into before my next go at something like this.

Zucchini on FoodistaZucchini

Monday, September 6, 2010

Z is for Spinach Zucchini Balls

This falls firmly into the category of Foods That Hide the Zucchini. (That sounds way naughtier than I intended, . . . but note that I do not delete it.)

My friend decided to hold a poker party in honor of her birthday. She asked me to bring some zucchini to grill and also a snack.

Enter the Spinach Balls, a time honored family recipe. First shared with us when my favorite aunt married in, it's my go-to when busting out a savory snack for large group sharing.

Spinach Balls + over abundant zucchini = sneaky deliciousness.

What I Did:

1.5 cups baby spinach, chopped (frozen spinach is also totally ok)
1.5 cups of zucchini, grated
1/2 tsp each of:
garlic salt, white pepper, celery salt, chicken bouillon powder, basil

1 stick of butter
3 shallots
1 clove of garlic

2 cups of Stove Top mix
2 large eggs
1/2 cup parmesan cheese, grated

0) Preheat oven to 350

1) Add spinach, zucchini and spices to a pot.

2) Add enough water to cover veggies.

3) Bring to a boil and then let cook as you proceed with the other steps, stirring occasionally.

4) Chop shallots and garlic and saute in the butter until they are transparent.

5) Turn off veggies and onion/butter pans and allow them to cool.

6) Combine stuffing mix, eggs and cheese in a bowl.

7) Strain water from veggies. Mix veggies into stuffing mix.

8) Mix butter/onion/garlic mixture into stuffing mix.

9) Shape the mix into large marble-sized balls and place on a baking sheet.

10) Bake for 15 minutes.

How Did It Go:
Awesomely. The balls were gone before anything else, several people at the party asked me for the recipe, and no one seemed aware that there was zucchini involved. Win, win and win. Thanks to Aunt Mary, as always, for this no-fail recipe of tastiness.

What Would I Do Differently:
Nothing to make it better, but I think it's fair to point out that this is a very flexible recipe. More/different onions, different cheese, different spices; I've done all these at various times and it's always worked out (and, as suggested, the zucchini is not an original part of this recipe), so feel free to play and substitute. The only thing you can't stint on is the butter. At least, I don't think you can. I've never tried it. If you do, let me know how it goes.

Monday, August 30, 2010

Z is for Zucchini Marinade for Grilling

Since posting yesterday's picture to my FaceBook profile, I've received two requests for zucchini sharing and three recipes. I heart you internet!

***

For me, the easiest way to deal with zucchini is on the grill. It's low fuss and in summer I tend to be grilling a meat for dinner anyway. Grilling zucchini plain totally works, but sometimes I want a little something more to it, which is when I throw together this marinade. Bonus: it works for every other vegetable I've throw at it so far (asparagus, broccoli, green beans) plus also makes a darn good salad dressing.

What I Do:

extra virgin olive oil
balsamic vinegar
dried tarragon
white pepper (feel free to substitute black)
salt

(sorry there aren't real amounts here, but I tend to eyeball based on what I'm using it for)

- preheat your grill*

- mix approx equal parts of the oil and vinegar

- add salt and pepper in equal amounts and roughly twice as much of the tarragon. mix.

- halve the zucchini length-wise and add to the mix

- shake or stir to coat as needed, and let sit for 15 minutes

Grilling time varies. I find a medium sized zucchini (2x9 inches) times out pretty well with pork chops (1 inch or so thick), but you know your grill better than I do. Speaking of which:

*Yes, I use a propane grill. If it makes you feel better, I'm ready to admit the superiority of charcoal. Gas is just more practical on a night-to-night basis.

Wednesday, August 18, 2010

D is for Delayed Duck

Remember that frozen duck? The one from five months ago? That one?

Yeah. What can I say? It's been a busy busy spring/early summer.

So let's jump in the wayback machine, and travel back to a more innocent time: Late March, when the duck finally thawed.

I did the google thang per usual, and read recipes from Food Network, Epicurious and Cooks dot com, besides consulting my perennial favorite for large poultry roasting, The Joy of Cooking.

The big concerns in duck roasting seem to be
a) getting rid of the fat, because there is apparently a lot of it, and
b) avoiding "off-flavors" (I'm assuming they mean "gaminess" here...?)

Some people also seem to really, really long for an extra crispy duck skin. However, since this was my first duck, I wasn't going to push myself too hard.

What I Did:

one duck, fresh or thawed
salt
pepper
shallot

0.5) Preheat oven to 450 degrees

1) Rinse duck and pat dry

2) Place duck, breast up, on a rack in a shallow baking pan

3) Score the duck:
- make a series of shallow, diagonal cuts along one side of the bird torso
- "shallow" in this case means you should cut through the skin, but not the fat
- cut along the duck on the other diagonal, creating a diamond pattern.
- repeat on the other side of the torso

4) Rub the duck inside and out with salt and pepper (you could go with herbs here as well, I imagine)

5) Put a shallot inside the duck cavity (the recipes inform me that citrus fruits, root veggies, etc, would work just as well for this)

6) Place pan and duck in the oven

7) Reduce the temperature immediately to 350

8) Cook 20 minutes per pound of bird

9) Remove from oven

10) Allow to rest for ten-ish minutes, discard shallot from cavity, carve and serve

How Did it Go?
Great! The duck was juicy but not greasy, the flavor was mild, and life was good. It is fair to note here that Mr. Husband found the taste a bit odder than I did, so duck is not likely to become a household staple.

What Would I Do Differently?
Blog about it in a more timely manner. :-p Sorry about that, y'all.

Tuesday, February 2, 2010

C is for Lamb Shanks with Cranberries

I wanted to come up with a savory cranberry recipe, errr, just because, so I started by thinking about what kinds of meat would be able to stand up to that. I decided lamb or duck might be good bets, since they have intense flavour, so I bopped over to the store.

Duck = Fail, so lamb won by default, which was not a bummer of any sort for me, since I love lamb. But I'd never cooked it before, so the adventurous-ness level of this undertaking cranked way up. Add on the experience of My First Reduction Sauce and I had a lot of fun with this one.

I consulted the recipe on the lamb package plus this one from AllRecipes.com before jumping in.

What I Did:

2 lamb shanks
salt
white pepper
2 Tablespoons olive oil
5 cloves of garlic
2 shallots, chopped
2 cups fresh cranberries
2 cups chopped carrots
2 cups chopped zucchini
approx. 1 cup each of
- beef broth
- chicken broth
- red wine
- white wine
1 Tblspn dry rosemary
1 Tblspn dry thyme
1 Tblspn dry mint
dash of cranberry juice

1) Heat oil in a skillet over medium high heat and sprinkle shanks with salt and pepper.

2) Cook lamb shanks until brown on all sides and remove to plate.

3) Add garlic, shallots, cranberries, carrots and zucchini to skillet and saute for 5-10 minutes.

4) Stir broth, wine, rosemary, thyme and mint into skillet.

5) Place lamb shanks in a crockpot and pour the skillet contents over them. The liquid should cover the shanks, so if it doesn't, add more both and/or wine until they are covered.


6) Leave everything in the crockpot on high for 3 hours.

7) Pour 2-4 ladles worth of the cooking liquid back into the sautéing skillet over low heat. It's ok if you catch some of the cranberries here as well.

7.5) Leave the lid off the crockpot, but the heat on.

8) Add cranberry juice to the skillet to taste.

9) Simmer until the liquid has reduced by half.

10) Split the veggies and shanks onto two plates and drizzle with the reduction sauce. Serve with starch of your choice if so inclined.

How Did it Go?
Great! Holy cow, lamb is as easy to cook as pot roast. Now, if it were only similar price-wise, I could all but give up beef. Well, not steak. Yum.

What would I do differently?
Um, for once, nothing. Made more shanks so I could've had leftovers?

Tuesday, January 26, 2010

C is for Cranberry-Blueberry Muffins

I've made muffins from a mix before but never from scratch. My bag of dried cranberries (plus a bag of dried blueberries that I'm looking to use up because I find them too sweet) inspired me to give it a go.

The muffin base recipe is mostly from Joy of Cooking. I went my own way with the mix-ins treatment.

What I Did:

1/2 cup dried cranberries
1/2 cup dried blueberries
white wine (enough to cover fruit)

1 3/4 cups all purpose flour
3/4 teaspoon salt
1/4 cup sugar
2 teaspoons baking powder

2 eggs
2 Tablespoons melted butter
3/4 cup milk

0) Preheat oven to 400

0.5) Soak the dried fruit in the wine for an hour or so. (This is also called macerating, if you want the five dollar word).

1) Sift together flour, salt, sugar and baking powder.

2) Drain the dried fruit.

3) Beat the eggs until mixed.

4) Mix melted butter and milk into the beaten eggs.

5) Mix the dry ingredients into the wet ingredients in as few strokes as possible. The batter will be lumpy.

6) When the dry ingredients are almost completely moist, add the fruit and finish mixing.

7) Either grease your muffin pans or line them with cupcake cups and fill them up approximately 2/3 full with batter. (I just use a big spoon for this.)

8) Bake for 20-25 minutes. Yields 20ish muffins.

How'd it Go?
Not bad. The texture was really good. And the flavor was good, except…they just weren't as sweet as I'm looking for in a breakfast muffin. If these had been muffins intended to go along with stew, they would've been perfect.

What Would I Change?
~ More sugar! (Inside and on the top.)

Sunday, January 3, 2010

C is for Cranberry Bread Pudding

We host an Orphan's Thanksgiving every year, potluck-style, so each Black Friday finds me with some ingredients in my kitchen that wouldn't normally be there. I enjoy this, because it gives me a chance to play, but I was initially perplexed by this year's leftover Can of Gelled Cranberry Loaf. Fortunately the delicious loaf of day-old home baked bread inspired me:


(As usual, I researched a couple of recipes online before starting.)

Here's What I Did:

- Pudding -
1/2 can of cranberry gel stuff
1 box of non-instant Flan (4 servings)
2 cups of cold milk
1 loaf of dry bread

- Sauce -
1/2 can of cranberry gel stuff
vodka
confectioner's sugar

- Whipped Cream -
whipping cream
confectioner's sugar
(optional, because I will not judge you if you prefer Cool Whip or spray whip cream. I only made this because I had the cream handy)

0) Preheat over to 350 degrees

1) Put 1/2 of cranberry gel in a small saucepan and add the milk.

2) Over low heat, whisk together until mostly combined.

3) Whisk in flan powder until combined.

4) Turn the heat up to low medium and bring to a boil, stirring frequently.

5) While waiting for the pudding to boil, butter the sides of a small loaf pan.

6) Break down the loaf of bread into bite-size chunks and place in the loaf pan.

7) Once the pudding has reached a boil, pour it over the bread chunks.

8) Bake for 45-60 minutes.

9) Place the other half of the gel in another small saucepan.

10) Over low heat, add confectioners sugar and vodka to taste (I wound up using about a 1/4 cup of each), stirring constantly.

11) Bring it to a boil and boil for about a minute, stirring frantically.

Optional 12) Beat 1 cup of cream in a cold bowl.

Optional 12.5) As cream starts to stiffen, add confectioner's sugar to taste

13) Serve pudding in slices, liberally covered in sauce and cream.


How'd It Go?
Surprisingly well, considering I've never, ever made bread pudding before. I felt like the pudding absorption was kind of inconsistent, so the texture varied throughout the slice in a way I didn't love, but it was definitely tasty. And the sauce was deemed awesome by Mr. Husband.

What Would I Change?
- I think a vanilla pudding might have gone a little better with the cranberries than the flan.
- More of the pudding probably would've solved my texture issue, so next time I'll kick it up to the 6 serving sized box.

Friday, January 1, 2010

C is for Cranberry Champagne Cocktail

One of the nicer duties of my former job involved specialing up Opening Night of each show with cocktails. This is the one I used for the Christmas show in 2008 (I _almost_ said last year there, yes):

What I Did:
1 part white champagne
1 part pink champagne
1 part cranberry juice
some fresh cranberries (2 or 3 per glass)

- combine and serve in a champagne glass (if you have them)

Simple yet tasty, festive, and popular with the people. Happy New Year, folks!

Sunday, November 22, 2009

B is for Bacon Beignets

I'm not from New Orleans. In fact, I've never even been there. The closest I've come to this tasty treat was at sleepovers with one of my friends in elementary school. In the mornings, her mom would let us make "doughnuts" out of Pillsbury biscuit dough, deep fried, then covered with cinnamon and sugar. (If you don't have time to do a real dough, I bet that would still taste pretty darn good.)

The biggest inspiration for this recipe (besides, as always, King Bacon) were the crawfish beignets at Alligator Soul in Everett, Washington. Recipe guidance came mostly from here and a little from here, with some frying oil advice here, since I don't fry stuff very often.

Here's What I Did:
1 Envelope Active Dry Yeast

3/4 Cup Water (110 degrees F)

1/4 Cup Granulated Sugar

1/2 tsp Salt
1 Beaten Egg

1/2 Cup Evaporated Milk

3 1/2 – 3 3/4 Cups Flour
4-6 slices of bacon

1/8 Cup Shortening

Vegetable Oil for Frying

Powdered Sugar

1) Fry the bacon until crispy. Drain and set aside.

2) Combine the Yeast, Water, and Sugar in a food processor,

3) Let this sit until frothy, about 5 minutes,

4) Add the Salt, Egg, and Evaporated Milk and mix on low speed,

5) Add half of the flour and mix until it starts to come together,

6) Add the shortening and bacon. Mix.

7) When the shortening and bacon are incorporated, start adding the remaining flour, a little at a time until most of it is incorporated.

8) Add just enough flour to make a non-sticky, smooth dough.

9) Place the dough into a large oiled bowl, loosely cover and let rise
NOTE: The original recipe had the following statement "I made mine last night and let it rise overnight in the refrigerator." I did not have good luck with that method and had to do an emergency dough recovery. More on that below.

10) After the dough has doubled in bulk, (3-ish hours) punch it down and turn it onto a floured surface

11) Roll out to about 1/2″ thick.

12) Cut out with cookie cutters. (I used a ghost, an autumn leaf and a snowflake. Apparently diamonds, rectangles and circles are more traditional.)

13) Place the Beignets on a floured baking sheet to let rise about 40 minutes in a warm place (I put them in a barely warm oven. Preheat to 200 for 2 minutes, then turn the heat off and shove the dough in.)


14) When the Beignets have risen, heat 2-3 inches of vegetable oil in a large saucepan to 350-360 degrees.

15) Place 2-4 Beignets into the hot oil at a time, being careful not to smash or deflate them.

16) When they are golden brown, flip them over until golden brown on the other side (This goes VERY quickly so start checking them right after they go into the oil).

17) Remove to paper towel lined plates to drain.

18) Serve hot topped with plenty of powdered sugar

The original recipe says this makes about 2 dozen. I got about that out of it, maybe a little more; I think I was making them smaller.

How'd it go?
Great. Fried dough is just a tasty tasty thing. The bacon fit in nicely, no big surprise there.

I made 7 yesterday which were fried and eaten and then another 20-25ish I pre cut and put into the freezer; supposedly I'll be able to thaw and fry them later in little batches. We'll see how that goes.

What would I change:

- Well, I don't think i'll ever try to get dough to rise in the refrigerator again. As I said yesterday, I awoke to non-risen dough. The save that worked was placing the dough in a barely warmed over for awhile (Preheat to 200 for 2 minutes, then turn the heat off and shove the dough in). Thank you, friendly bakers of the interweb!

- I would use more bacon. There's some in every pastry, but I would like more for even more bacony flavor.

Wednesday, November 18, 2009

B is for Breakfast Souffle

This is my family's traditional Christmas morning breakfast. It's not only tasty, but also practical; you make it the night before and on The Day you can just pop it in the oven and be good to go by the time you're done with the stockings.

1 1/2 to 2 lbs bulk sausage (may I suggest Bacon sausage?)
18 eggs, slightly beaten
2 cups milk
1/2 teaspoon dry mustard
1 teaspoon salt
3 slices white bread
1 to 1 1/2 cups grated cheddar cheese
mushrooms and/or onion – optional

1) Brown sausage and drain.
2) Remove crust from bread and cut into 1/4 in cubes
3) Mix eggs, milk, mustard, salt, bread cubes and cheese in large mixing bowl
4) Stir in sausage.
4.5) Also stir inmushrooms and onions at this point if you're going to.
5) Pour into greased 13x9x2 inch casserole
6) Cover and refrigerate overnight.
7) Bake uncovered in 350 degree oven for 1 hour.

Serves 12.

I share not because I cooked this today but because I was sent the recipe from my mom and sister today. Love love love.

Thursday, November 5, 2009

B is for Bacon Berry Cheesecake, part 2

Words! Recipe words which I will type with my hands and you will read with your eyeballs:

Here’s What I Did (with a respectful nod in the direction of the Classic Philadelphia Cream Cheese Cheesecake recipe)
~Crust~
1 ¾ Cups Granny’s Pie Crust Mix
4 Tablespoons Cold Milk

~Filling~
4 pkg. (8 oz. each) Cream Cheese, softened
1 cup sugar
1 tsp. vanilla
One cup sour cream
15 oz mixed berries (raspberry, blackberry and blueberry in this case)
4 eggs

~Topping~
3 slices of American bacon (you can use more or less to taste)
Sprinkle of brown sugar
1 stick of unsalted butter
½ cup sugar
¾ cup flour

0) Preheat oven to 325 degrees.

0.5) Set cream cheese and butter out to soften.

1) Roll out one pie crust and place in the pie pan.

2) Bake for ten minutes.

3) While the crust is pre-baking, mince up some bacon (or be lazy and do a “rustic” cut like I did)

4) Fry the bacon.

5) When the bacon seems almost halfway done (to your taste…as previously stated, I like mine very crispy), sprinkle it with a healthy dose of brown sugar and continue to fry until the sugar is melted.

6) Place the sugary bacon bits on a paper towel to drain and cool.

6.5) If ten minutes have passed, which is probably the case at this point, take the crust out of the oven and set aside to cool.

7) Mix cream cheese with 1 cup sugar and the vanilla.

8) Add sour cream and berries and mix again well blended.

9) Add eggs: one egg at a time, mixing between eggs until _just_ blended.

10) Pour into the crust.

NOTE: Depending on the size of your pie pan, you may have leftover filling. May I recommend some CheeseCake Cuppy Cakes?

11) Evenly top the filling with the sugary bacon.

12) Combine butter, ½ cup sugar and the flour.

13) Add this on top of the bacon.

14) Bake for 40ish minutes (until center is almost set)

15) Cool.

16) Place in refrigerator for AT LEAST 4 hours. Overnight is even better.

How’d It Go?
Great. A tasty treat with the full approval of both myself and Mr. Husband. My sister, mom and brother-in-law have all also enjoyed this recipe during Christmas Past.
I once entered this in a Dessert Dash, but I wasn’t able to find the table that won it to ask their opinions. Ah well.

What would I do differently?
- Give a proper mince to the bacon next time. Lazy me.
- Remember that I have a food processor. This would be easier than just using my trusty hand mixer for all mixing steps.

Sunday, October 18, 2009

B is for Warm Bacon Vinaigrette

Let's begin gently, shall we? The first time I encountered a warm bacon salad dressing was having dinner with/meeting Mr. Husband's (Mr. Fiance at the time) parents. I'm usually just as happy to skip the salad and get straight to the entree, but I wasn't in charge of the flow of the meal. And I fully admit, I don't actually remember what we ate for the main course that night. What I remember is the magical combination of spinach and bacon. Mmmmm.

But I had never made it for myself at home. I consulted the interweb, particularly this recipe from Chow before starting, but (of course) jumped off a bit to adjust for personal taste and ingredients not at hand.

Here's what I did:
3 slices of bacon
1/2-ish of a small shallot, chopped
1/4 cup apple cider vinegar
1 Tblspoon balsamic vinegar
1 teaspoon brown sugar
1/2 teaspoon Dijon mustard
1/2 pound fresh spinach,
1/4 cup almonds, walnuts and macadamia nuts coarsely chopped
1 hard boiled egg

- I cut the bacon into small pieces (a rustic dice, if you want something to call it. aka, unskilled knifery)
- Then I put the bacon in a medium frying pan over medium heat and cooked, stirring once in awhile, until crispy.
- While the bacon was cooking, I washed the spinach, cut off the stems (snacked on those; they are tasty) and tore the spinach into bite-size pieces. I seperated that into two bowls.
- Added the nuts on top of the spinach.
- I also sliced a hard boiled egg and put it on my salad (Mr. Husband doesn't like hard boiled egg, so that leaves more for me)
- Spooned the finished bacon onto a paper towel-lined plate.
- Kept the pan with bacon fat over the heat, added the shallot, and cooked about 30 seconds.
- Then I whisked in the vinegar, brown sugar, and Dijon mustard
- IF YOU WANT YOUR SPINACH WILTED: Keep the vinaigrette on the heat and season with salt and freshly ground black pepper.
- And then pour it directly over the salad.
- IF YOU DO NOT WANT YOUR SPINACH WILTED: Remove from heat to season. (I did the second of these, following the recipe too far, but would rather have gone the Wilted route)
- And then I sprinkled 1/2 of the bacon over the top of each salad.

What I would change:
Very little. Just would've made sure it was still hot when it encountered the spinach. Next time.

Monday, September 28, 2009

A is for the Agony of the Actor AND All About Grannie

I was sitting around this evening, puttering, doing nothing much, basically waiting to be told the outcome of last week's audition, when I decided this was as good a time as any to explain about Grannie.

Grannie is not my grandmother. I've never met her. Given that she's my husband's ex-wife's grandma, it seems likely I never will. Nonetheless, I highly respect this woman and owe her a debt, because I have been gifted with her recipes.

Reading them is a delight. They're the work of a woman who's been cooking for a houseful forever and will graciously make room at the table for any family or friends who happen to be by when dinnertime comes. And working with them is fun because they contain the vague-eries of someone who really doesn't use a recipe but is making a stab at it as a favor for an eager grandson-in-law; so you have to curl up with them and read intently before you begin, and then you need to ready to do some in-process interpretation.

Here's her recipe for Pie Crust Mix:

(no need to refrigerate)
7 cups Flour
1 lb Crisco
1 Tablespoon Salt

Measure flour, add salt, then sift together into a large bowl.

Add about 1/2 the Crisco, and cut in until like coarse meal. Add remaining Crisco. Cut in, but not too fine.

Store in covered container.

=====

For a 2 crust pie - (Our size 10 1/2 to 11 inches)

3 1/2 Cups Mix
8 Tablespoons Cold Milk

Mix in a bowl, with a fork, until blended. Knead slightly until mixture forms together. Use 1/2 for each crust. Roll out on floured board or cloth.

Bake pies at 450 degrees for 10 minutes; Lower to 375 degrees until done.

A is for Dutch Apple Pie

Back when I was working as a full time actor I spent a September/October as a pig race emcee at an apple orchard. I made friends with the ladies in the bakery, which was great, 'cause they would offer me a slice of something tasty every morning and an entire pie to take home most afternoons. The “Dutch” treatment emerged as my favourite.

Here’s what I did today:

- Crust -
3 ½ cups flour
½ TBLspns salt
½ lb Crisco
4 TBLspns cold milk

- Filling -
2 Granny Smith apples
2 Gala apples
1 Green Tomato
½ cup sugar
½ teaspn cinnamon
dash of lemon juice

- Topping -
1 stick of unsalted butter
½ cup sugar
¾ cup flour

0.5) Preheated oven to 425 degrees.

- Crust -
1) Mixed flour and salt together in the food processor

2) Cut Crisco into cubes and added to processor. Pulsed seven times to blend.

3) Left 1 ½ cups of the resulting mixture in the food processor and mixed together with the cold milk.
*** The remaining mixture I put in a covered container and set aside for future pie action. More on this later.

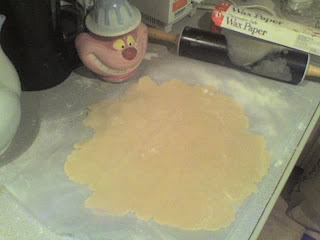
4) Shaped the resulting dough into a rough ball, placed on wax paper on a flat surface and flattened a bit. Placed a second sheet of waxed paper on top and rolled the dough out until it was big enough to place into my (new!) 9 inch pie dish.

*** Full disclosure: I tried rolling the crust out on a floured board first, but this led to much swearing. In this my time of need I turned to Mr. Interweb, and he gifted me with a full page of Pie Crust Troubleshooting advice.

- Filling -
5) Peeled, cored and sliced 4 apples. Sliced 1 green tomato. Placed all the slices on top of the bottom crust in the pie pan.

6) Sprinkled ½ cup sugar and ½ teaspn cinnamon evenly over the apples. Added a dash of lemon juice.

7) Chopped the stick of butter into chunks and added it and the sugar and flour to the food processor. Blended.

8) Sprinkled topping over the pie.

9) Baked the pie 10 minutes and then lowered the temperature to 400 degrees. Cooked for 35 more minutes.

How’d It Go?
I think it turned out very very well. Crispy where it should be, soft where it should be, tasty all the way through. I’ve been bellowing “Behold! I have made pie!” at random intervals throughout the remainder of the evening. This may have something to do with this being my first baked crust from scratch. Mr. Husband is tolerating this very well, probably because he agrees that the pie is replete with tasty goodness.

Sources:
I built this recipe with help from Grannie's Pie Crust Recipe (more on this in a later post), this Dutch Apple Pie Recipe at Cooks dot com and, drat, I'm forgetting where I first read about using green tomatoes in an apple pie; I'll get back to you on that bit.

Thursday, September 24, 2009

A is for Baked Apples

Full disclosure: I wanted to start with an apple pie but discovered the horrible fact that I do not own any pie pans. How in the name of god is this possible??!? Anyhoo, it threw me back on a simpler idea, which may've been for the best.

Baked Apples
The first time I had these was actually last October. My family and I were spending a week keeping the New Dungeness Lighthouse and my Aunt Cheri made us "Baked" Apples (microwaved, actually); they were wicked awesome.

Unfortunately she lives in the central time zone and I'm in pacific standard, so I didn't feel comfortable calling her for the recipe at 9:30pm my time. (Note to self: Cook earlier.) So I cobbled together a game plan from recipes at AllRecipes, Food Network and The Joy of Cooking.

Here's what I did:

3 apples
dash of bitters
dash of lemon juice
3 tsp white sugar
5 tblspns of unsalted butter
cinnamon
4 tsp brown sugar
shot of whiskey
2 shots of water

0.5) Preheated oven to 375 degrees

1) As mentioned in the previous post, I started with three different apples (Gala, Elstar and MacIntosh), which is a pretty solid baking no-no. I sliced the top 5th off of each and put them in a loaf pan.


***I ate the tops to get a feel for the apples at hand. My fave was the Gala, a nice balance between the other two; Elstar was sweeter, MacIn was tart-er.***

2) Dug out the core of each with a spoon. Basically worked down until just past the seeds.

3) Added a teaspoon of white sugar to the core of each apple.

4) Dashed lemon juice on the top of the Elstar, bitters on the other two.

5) Divided the butter into 3 equal-ish sized chunks and put this in the core of each apple.

6) Sprinkled enough cinnamon to somewhat cover the top of each apple.


7) Added whiskey and water to bottom of pan.
7.5) Accidentally got a little whiskey on the Elstar. Whoops.

8) Added a teaspoon and a pinch extra of brown sugar to the top of each apple.

9) Baked for thirty minutes. (Checked at twenty; not done.)

The Outcome:

I felt a bit like Goldilocks and the 3 Apples: The Elstar was too hard, the MacIn too soft (it kind of 'sploded...on the left there) and the Gala was just right. They all could've used a touch more sugar and cinnamon, but were tasty nonetheless.

What I would/will change next time:
- Use all the same apples, probably Galas. Baking is delicious but fascist; it likes uniformity.

- Make the middle holes a bit wider to a) aid in baking and b) hold more of the good stuff