I've traveled to see family for the last seven years, so my December holidays find me doing very little personal baking, but plenty of cooking in other people's kitchens.
Like yesterday, when I was urgently requested to make a batch of chocolate chip cookies. They were completely gone within 8 minutes of hitting the plate.
Or take today, when we made five dozen cookies. I'm hoping they last for awhile. A long while.
And then tomorrow I am to whip up some Toasted Ravioli. I'll be using the easy method, which would feel like cheating except
a) my sister doesn't have a pasta maker or a food processor
b) you can buy frozen Toasted Ravioli in the store here, so i'm actually being much less lazy than i _could_ be.
I think Christmas Day I'll be in charge of green beans (casserole style) and gravy. Let's start praying to the gravy god now, shall we? No lumps, no lumps, no lumps.....
Anyway, whether your Christmas finds you up to your elbows in flour and giblets, or being decorative while others do the heavy cooking, I hope you have a happy one!
~ Raej
Thursday, December 23, 2010
S is for Sixth
Hi everybody!
Just wanted to say: Thanks for voting for me in the Iron Foodie Challenge.
I got sixth. Not bad for a relative beginner. It comes with no further prize except a warm and fuzzy feeling. Mmmmm!
Just wanted to say: Thanks for voting for me in the Iron Foodie Challenge.
I got sixth. Not bad for a relative beginner. It comes with no further prize except a warm and fuzzy feeling. Mmmmm!
Friday, December 10, 2010
I is for Iron Foodie, Prequel 3
or E is for Easy Toasted Ravioli
Before I launched into my Iron Foodie recipe, I decided to do a Proof of Concept pre-run (Mythbusters fan, yes).
I'd found plenty of easy-ish looking Toasted Ravioli recipes out on the interwebs, but I had no idea whether or not they would wind up tasting like the real thing.
Hey, what better time to take on a completely untried recipe than Thanksgiving? Oh, just about any time, I would normally say. Since I, however, am an experienced member of The School of Turkey Basting, I wind up with a fair amount of free time in the kitchen on Feast Day. So I jumped in.
What I Did:
1 egg
2 tablespoons heavy whipping cream
1 cup stuffing cubes
1 pumpkin cookie, stale
frying oil
1 package of Spinach and Cheese Ravioli
1 jar of Vodka sauce
1) Use a fork to mix together egg and cream in a shallow bowl.
2) Put the stuffing cubes and cookie into food processor and mix until the cubes are crumbs. Place in a bowl or on a small plate.
3) Fill a skillet with oil for frying (I like to go about 1/2 inch deep. You do what suits you) and warm over medium heat.
4) Dip ravioli in the egg mixture, shake off excess.
5) Dip eggy ravioli in crumbs, shake off excess.
6) Place ravioli in hot oil. Fry 3-4 minutes per side.
7) Pour sauce into a small sauce pain and warm over low heat.
8) Put fried raviolis on a paper towel-lined plate.
9) Serve ravioli with sauce. Eat. Enjoy!
How Did it Go?
Great! I put this out as an appetizer and people devoured and praised it, despite not having ever heard of it before. (Not a lot of St. Louisians on hand here in Seattle.) So, concept proved as far as I was concerned.
What Would I Change?
- I started heating the oil a little late, so the first couple of ravioli weren't as crispy as I would have liked. I wound up adjusting this for my Iron Foodie recipe.
- The cookie crumbs wound up a little too big. They tasted ok, but it threw the texture off a little. (To me. Pretty sure my friends didn't notice/care.)
Tuesday, December 7, 2010
E is for Foods that start with E?
While I wait and hope to become an Iron Foodie, it's also probably time to get back to regular business, yes?
We're on the letter E. Currently under consideration:
- eggs
- eggplant
- elk
Any suggestions from the peanut gallery? I'm open.
We're on the letter E. Currently under consideration:
- eggs
- eggplant
- elk
Any suggestions from the peanut gallery? I'm open.
Monday, December 6, 2010
I is for Iron Foodie Ingredient Sampling, part 2
Ideally I'd've talked about this _before_ posting my Iron Foodie entry recipe, but, well, Tech Week interfered. Consider this a prequel. : )
The Marx Foods Box of Mystery contained two ingredients that, in my opinion, needed a platform for useful/accurate tasting:
- Smoked Salt
- Tellicherry Peppercorns
(Of course you _can_ eat pepper and salt plain, but they don't tend to taste very good that way.)
What I did:
1) I equipped myself with a couple of steaks. Salt and pepper are the only things I like to put on a steak (credit to Alton Brown's I'm Just Here for the Food for this preference), so I figured this would make the differences between basic salt and pepper and the gourmet versions pretty apparent.
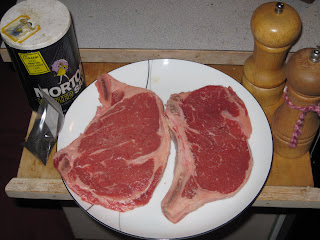
Salts on the left, peppers on the right. Grinder with the special pepper indicated by the purty pink ribbon.
2) I salted and peppered each side of the steaks and let them sit for 20 minutes while the broiler preheated.

Regular pepper on the left steak, Tellicherry on the right. Smoked salt across the top, regular table salt across the bottom.
3) I put the steaks in the broiler, 5 minutes per side.
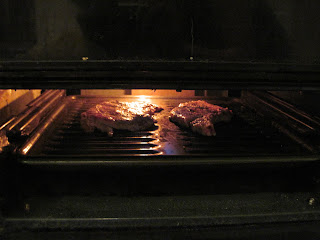
4) I let the steaks rest as long as I could bear (seven minutes in this case) and served with sides of my choice (tots! brussels sprouts!)

How Did it Go?
- The Smoked Salt has a really, really strong scent before you cook it, which, to be honest, worried me a bit. It seemed that it could easily be overpowering. Fortunately, this was not the case. Cooking mellowed it out a little, while letting it keep the smokey edge. It worked really well with steak, and I bet would be good with lamb as well.
- The Tellicherry Peppercorns seemed to be both more and less subtle than your average black table pepper. The pepper taste was gentler, but the heat level was cranked up. *Full disclosure: I did go ahead and eat one of each type of peppercorn, just to confirm this impression. Whew. It confirmed both that opinion, plus my notion that eating pepper plain is just not a good idea.
If you'd like to see what I wound up doing with these ingredients, click here to see my Iron Foodie recipe: Toasted Ravioli.
Friday, December 3, 2010
T is for Toasted Ravioli or I is for Iron Foodie Contest Recipe
Ok, Tech Week almost done, deadline looming, here, finally, is The Recipe.
(Here's Marx Food's Iron Foodie Contest explained, in case you're just now tuning in.)
Toasted Ravioli is a local specialty in my hometown of St. Louis, Missouri and is very hard to find elsewhere. In fact, most people who haven't spent time in StL have never even heard of it. This is their bad luck, because it's very very very good. How good? The only hometown food I miss more is White Castle.
Since, as I mentioned earlier, I was already thinking in an Italian/meat-ward direction, Toasted Ravioli was a most acceptable brain wave. As usual, I hit the internet for some recipe theory research, and found some useful stuff.
In fact, I did a sort of proof of concept experiment as a Thanksgiving appetizer. It was definitely well received. But I decided Iron Foodie deserved no less than true, complete insanity. So, I made mine from scratch. Research debts also in the direction of Cooks dot com and Betty Crocker's New Cookbook (the 1st cookbook I owned as an adult).
What I Did:
~ Pasta ~
1/3 cup of macerated Dulse Seaweed*
2 large eggs
1 TBLSP olive oil
1/2 tsn Smoked Salt*
2+ cups flour
0) Soak the seaweed in boiling water for 15 minutes (this is macerating. big word, simple concept.)
1) Combine eggs, seaweed, oil and salt in a food processor until blended.
2) Put the flour on a decent sized flat surface and create a well in the middle (a sort of volcano shaped thing; the crater is to hold the liquid.)
3) Slowly work the flour into the liquid until completely combined. (This gets messy. No worries.)
4) At this point you will most likely have to adjust your pasta dough. If it is too dry (crumbly, not sticking together, i.e., what happened to me), gradually incorporate little bits of liquid (TBLSP at a time) until you achieve a nice dough consistency. If it is too sticky, gradually incorporate bits of flour.
5) Knead the dough on a lightly floured surface for 5-8 minutes.
6) Plastic wrap the dough and rest in the fridge for several hours.

~ Filling ~
1 cup cubed squash
2 TBLSP olive oil
1 lb. ground pork
1/2 tsp Smoked Salt*
1/2 tsp ground Tellicherry Peppercorns*
1/3 of a medium sized onion, chopped
1/4 cup fresh sage
2 TBLSP fresh parsley
2 cloves garlic, SMASHED!
1/4 cup white wine
1/3 cup macerated Dried Wild Porcini Mushrooms*
1/2 cup cottage cheese
7) Parboil squash
8) Cook oil, pork, salt and pepper in a skillet over medium heat until pork is thoroughly cooked.
9) Add all other Filling ingredients (except cottage cheese) to skillet, cover and reduce heat to low; stir occasionally.

10) Cut one third off of the chilled pasta dough.
11) Roll it through a pasta machine on the widest setting. (If you don't have a pasta machine, use a rolling pin and skip ahead to step 15.)
12) Fold the pasta sheet in on itself from the ends, roughly into thirds. Sprinkle lightly with flour. The idea is to get it to a width where you can turn it 90 degrees and run in through the pasta machine again.
13) Click the pasta machine down one setting and run the pasta sheet through again.
14) Repeat 13 until you get the pasta as thin as you want it. (For me, this takes it down to the narrowest setting. So you can read through the pasta. Your taste may absolutely vary.)

15) Turn the heat off on the filling.
16) Lay the pasta sheet out on waxed paper. Cut pasta circles out of it with an upside down glass. (There are other ravioli cutting methods, but this one best appeals to my innate sense of laziness.)
17) Add filling and cottage cheese to food processor. Pulse for about 20 seconds, until everything is just combined.
18) Spoon small heaps of filling on one pasta circle.
19) Wet the entire edge of the circle (use water, butter, milk, whatever really…..I used the water from macerating the Porcini Mushrooms).

20) Place a second circle on top, and gently press edges together all the way around.
***It's right about here that this becomes the longest recipe I've ever done on this blog. HUZZAH FOR IRON FOODIENESS!***
~ Sauce ~
1 macerated Aji Panca Chili*
1/2 heavy whipping cream
1 clove garlic SMASHED!
1 can tomato sauce
1 tsp oregano
1 tsp basil
21) Slice open the chili and scrape out the seeds and membranes.
22) Chop chili and add it, garlic and cream to a small sauce pan. Warm over low heat.
23) Just as the cream wants to try boiling, turn off the heat.
24) Dump saucepan contents into food processor. Blend until completely mixed.
25) Return sauce to pan. Add tomato sauce, oregano and basil and warm over low heat, stirring occasionally.

~ Toasted…ing…ness…stuff... ~
1 egg
3 TBLSP heavy whipping cream
2 cups stuffing cubes
~ 1/4 cup parmesan cheese, grated
oil for frying
26) Fill a skillet with oil for frying (I like to go about 1/2 inch deep. You do what suits you.) and warm over medium heat.
27) Use a fork to mix together eggs and cream in a bowl.
28) Put the stuffing cubes and cheese into food processor and mix until the cubes are crumbs. Place in a bowl or on a small plate.
29) Dip ravioli in the egg mixture, shake off excess.
30) Dip eggy ravioli in crumbs, shake off excess.
31) Place ravioli in skillet. Fry 3-4 minutes per side.
32) Put fried raviolis on a paper towel-lined plate.
33) Serve ravioli with sauce. Eat. Enjoy!

How Did It Go?
It went surprisingly well, given the large number of new things i was trying (ingredients and techniques), and considering that I've not made scratch ravioli in a long long time. Texture was right on, flavor was pretty nice. Mostly a win here.
Also:
- The seaweed gave a really neat color to the pasta dough.
- The mushrooms rounded out the taste of the pork in a way that surprised me.
- The chili sauce wound up being not too hot for me, which is something of a miracle, frankly. And not being in pain, i was able to appreciate the flavor.
What Would I Do Differently?
- More filling! I put about a teaspoon's worth of filling in each ravioli, which wound up being not quite enough. The pasta to filling ratio was too high, which buried a lot of the flavor of the filling when everything was put together. Lacked balance.
- More vegetables! I think I'd up the butternut squash ratio a bit, just to get more vitamins involved. I mean, since you're eating something fried, it's nice to strike a blow for Stealth Health when you can.
Monday, November 29, 2010
I is for Iron Foodie Ingredient Sampling
Two of the items in The Marx Foods Mystery Box were
- Dried Wild Porcini Mushrooms
and
- Dried Aji Panca Chilies
Neither of which I had ever, to my knowledge, eaten. Yay for new food!
First things first, before I could really taste them, I had to macerate them...

...in this case, with boiling water.
And then wait 15-20 minutes.
The porcini mushroom had a nice intense flavor that, in weight, reminded me a bit of chicken liver. The texture was a bit chewy, so it's clear that I can't use these "raw".
The chili bits were, ummm, weeeeeell, I considered them spicy, but I tend to order a one-star at Thai and Indian restaurants. Even I can admit they were not really painful. And I could actually taste the red chili flavor. So "mild" is probably an accurate description.
Odds are good that we will find both of these ingredients in my Signature Recipe. :)
T is for Tech Week
The show I'm rehearsing is heading into Tech Week. (For those of you not in theatrrr, this means every waking moment, which will include more of those than usual, will be focused towards getting together a performance-ready piece by the end of the week.)
So I'm spending the evening working on my Iron Foodie recipe. Stay tuned.
So I'm spending the evening working on my Iron Foodie recipe. Stay tuned.
Friday, November 26, 2010
T is for Egyptian Turkey

The way I do the thanksgiving turkey winds up looking like I'm preparing it for the afterlife.
Which I guess I am, in a way.
As I said last year, I get my turkey method from The Joy of Cooking and, after 8 years, I'm a true believer. I know a lot of people are becoming converts to The Church of Brining, but the barding/basting 1-2 punch has never let me down, so I don't see changing it up any time soon.
But I can live in harmony with my brining brethren. 'Cause, really, isn't that what The Thanksgivinging is all about?
Monday, November 22, 2010
I is for Iron Foodie Thoughts
Not to give too much away before the actual recipe, but I've been chewing on the contest a bit (pun intended) and here's where I am:
- Everything in the box is essentially a spice (not technically, granted, but due to the dried-ness of things that would otherwise be more feature-able). This is both a great thing and a scary thing. (Yay, I can do anything! Whoa, I could do anything. Like that.)
- What do I like to cook? I ask myself, in order to narrow things down a bit. Answer: breakfast, dessert, Italian food, meat. I'm likely to do something in one or more of those categories.
- The fennel pollen is The Ingredient Least Likely to be Used. It's basically a more intense fennel experience. And, well, I kind of hate fennel. Not bell pepper level hate, but.....it reminds me of licorice (they're not related), which reminds me of NyQuil, which reminds me of unpleasant times.....you see the problem.
- Next up will be some ingredient tastings. Every time a cheftestant on a cooking reality show doesn't do this, I get very indignant at them (from the safety of my couch; yeah, I'm totally an armchair sous chef). So it's be pretty stupid of me not to. I'll keep you posted.
Thursday, November 18, 2010
I is for I still -heart- South Park
I'm sitting here watching the episode of South Park mocking the Food Network (and Food Network addicts...er, like me) and it's just so wrong but oh-so-right at the same time.
They had me at the late-nite Food Network HOTline:
"Do you want to deglaze this pan with me?"
"Oh yeah, I'm gonna deglaze that pan with you so good."
"It's searing hot..."
"Oh yeah. Do you have a wooden spoon?"
"Yeah, baby, I have a spoon and it's really hard."
hee!
They had me at the late-nite Food Network HOTline:
"Do you want to deglaze this pan with me?"
"Oh yeah, I'm gonna deglaze that pan with you so good."
"It's searing hot..."
"Oh yeah. Do you have a wooden spoon?"
"Yeah, baby, I have a spoon and it's really hard."
hee!
Wednesday, November 17, 2010
W is for What's In The Box??!? part 2
Other items in The Mysterious Marx Foods Box of Mystery:
~ Dried Aji Panca Chilies ~
The label says they are "mild". Being a spice wuss, I'm betting a more accurate assessment is "comparatively mild".
~ Dried Wild Porcini Mushrooms ~
Massive score!
~ Tellicherry Peppercorns ~
I did some pepper taste experiments a few years back, which is what led me to the wonderfulness that is White Pepper. I look forward to seeing how this one compares.
~ Dulse Seaweed ~
Reply hazy. Try again later.
~ Maple Sugar ~
Oh baby. This ingredient is in serious danger of not making it into recipe consideration because I may just have to eat it. I'll put it in one of those giant straws like I used to get at the roller skating rink and then ride the sugar high for the next 12 hours.
Monday, November 15, 2010
W is for What's In The Box??!?
Turns out The Mystery Box of Mysterious Iron Foodie Ingredients was on my doorstep when I got home Friday:
 It was, without contest, the best smelling box I've ever opened.
 Alas that there was no elk.
 It was, without contest, the best smelling box I've ever opened.
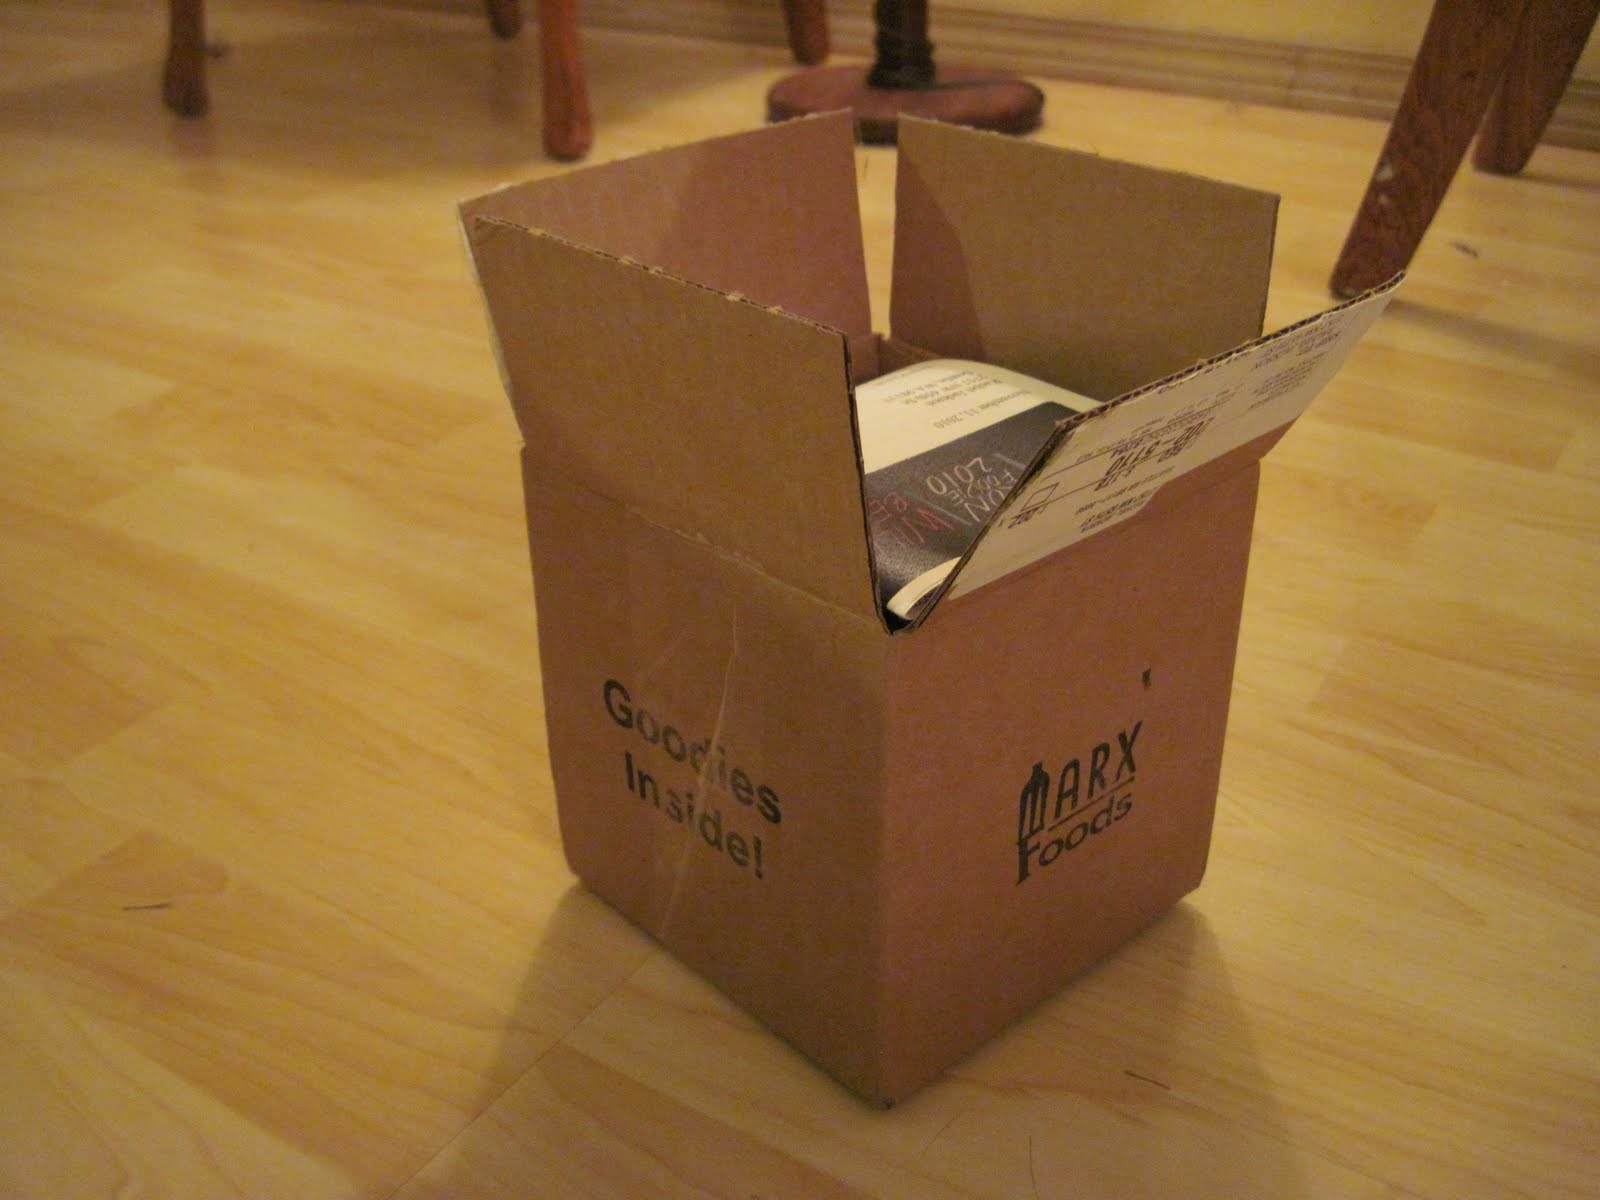 Alas that there was no elk.
 Ah well. All of the ingredients were dry, so it would've had to've been elk jerky, anyway. Try as I might, I just can't make myself feel too bad about a lack of elk jerky in my life.
 So there we have it. The strongest scented ingredients were the vanilla bourbon beans, the smoked salt (smells like BACON!) and the fennel pollen. More on the, ahem, subtler ingredients tomorrow.
 So there we have it. The strongest scented ingredients were the vanilla bourbon beans, the smoked salt (smells like BACON!) and the fennel pollen. More on the, ahem, subtler ingredients tomorrow.
(Not to worry. In the meantime, I'll be busy formulating my evil, contest-winning plan! Er, I mean, recipe. Yeah. Mwah ha ha ha ha!)
Friday, November 12, 2010
Z is for ZOMG! Iron Foodie Contest!
Well hey howdy hi, I got chosen to compete in the Marx Foods Iron Foodie Contest!
Squee!!!
As I type, apparently a box of 8 tasty food items is winging its way to me. I will need to use (at least?) 3 of these items in a Signature Recipe.
Since the box has already been sent, I have no scruples about telling you I'm crossing my fingers for Elk. I mean, "E" is next on the agenda, after all.
Oh, and truffles. Just because, hey: TRUFFLES.
Thursday, November 11, 2010
D is for Duck Liver Pâté
Once upon a time a blogger bought and cooked a duck.
Many moons later she blogged about it.
Two point five moons after that she finally got around to doing something with the duck liver.
Sooooo, I was _planning_ on following this recipe I found on epicurious pretty darn closely. Because making a pâté seemed like a fairly complex undertaking.
However, typically, I didn't have all the ingredients I needed, (FAIL!) so I had to make a couple of substitutions on the fly. (Remind me later to tell you about the time I got halfway through a batch of Toll House Cookies before realizing I was out of eggs. Sigh.)
What I Did:
bacon fat (approx 3 ounces)*
1 shallot
1 duck liver (approx 3 ounces)*
1/4 teaspoon herbes de Provence
1 clove garlic, peeled and crushed
1/4 teaspoon salt
1/4 teaspoon freshly ground black pepper
1 teaspoon sweet vermouth
toast
*I had to guesstimate the amount. Unless the ingredients in question are coming from a can, 'ounces' aren't a recognized unit of measurement in my kitchen. I used an glob of bacon fat that appeared to be about the same size as the liver and crossed my fingers.

1) Place bacon fat in a skillet, and cook over medium heat for 4 to 5 minutes, until the fat melts.
1.5) Chop the shallot, garlic and liver while waiting for the fat to melt.
2) Add the shallot to the fat, cook for about 30 seconds, stirring once or twice.
3) Add the liver, herbes and garlic, and cook over medium heat for two minutes, stirring occasionally.

**This is about when I realized that no part of making the pâté would be visually appealing. It smelled really good, though.
4) Add the salt and pepper. Remove from heat.
5) Throw everything into the food processor, add the vermouth, and blend until liquefied.
6) Cool in the fridge for about 30 minutes. Make toast during the end of this time.
How Did it Go?
Not too bad. Yeah, I think I can say that. It wasn't a pretty food, but it was definitely yummy. (Maybe this is where I should mention that I like braunschwager, just to give you a reference point for my taste.) It was probably a bit flat compared to Professional Pâtés, but I'm working from memory here, so I can't say for certain sure what the difference was.

What Would I Do Differently?
Where to start? Um…
- The original recipe called for a much longer cooling time. So I'd be interested to see if that was different taste-wise, or was just a texture thing.
- I'll admit that serving this on toasted pre-sliced sandwich loaf felt a little ghetto. If sharing with guests I'd definitely get a schmancier bread involved.
- Given duck livers enough and time, I'd try making several pâtés with several different alcohols. The vermouth was fine, but I find myself wondering about scotch…
Tuesday, November 9, 2010
D is for Duck Liver
Ok, hold onto your hats, kiddos. I think I'm going to try a little duck liver pate this evening.
Friday, November 5, 2010
I Wanna Be an Iron Foodie! (I Wanna Live a Life of Duty)
| | |
- Why do you want to compete in this challenge?
Besides the fact that I would adore the chance to be on Iron Chef someday (Iron Chef Fantasy Camp! Who's with me?), messing about with new ingredients is absolutely why i started this blog. It's a love match!
- Limitations of time/space notwithstanding, whose kitchen would you like to spend the day in & why? Julia Child, Thomas Keller, Ferran Adria, James Beard, Marie-Antoine Careme, or The Swedish Chef?
Totally The Swedish Chef. Not only does he personify the combination of my two greatest passions (cooking and puppets), but he was just such a pioneer in the field of Ballistic Gastronomy; it would be an honor to learn from such a master.
- What morsel are you most likely to swipe from family & friends’ plates when they aren’t looking?
Pickles. Can't get enough of them. (NOT PREGNANT, don't even suggest it.)
- Sum your childhood up in one meal.
Hamberger Casserole. Made in a classic Corningware dish, this family favorite recipe included not only mashed potatoes, but also Campbell's Tomato Soup and Velveeta. The cooking in my house growing up was all about the balance between comfort and convenience. (Frankly, I'm still a fan of this approach, though Mr. Husband draws the line at Velveeta.)
- The one mainstream food you can’t stand?
Bell. Peppers. Horrible, Fascist vegetables. The teeniest little amount of of bell pepper in a dish and BOOM! the flavor just takes over everything. Bleh and double bleh. Also, they give me gas. That's not good for anyone.
B is for Blogroll
Hey Campers. I've just joined The Foodie Blogroll! Look for more frequent blogging in the very near future.
Friday, September 17, 2010
Z is for Zucchini Chicken Parmigiana
I love Italian food, but one thing about it puzzles me: You often seem to have to choose between meat and vegetables. Meat Lasagna or Vegetable Lasagna. Chicken Parmigiana or Eggplant Parmigiana. Beef Ravioli or Cheese Ravioli.
I say bollocks to that.
What I Did:
1 medium size zucchini
3 boneless, skinless chicken thighs
1 egg
dash of water
flour (approx 1 cup)
Stove Top stuffing mix (approx 1 cup)
frying oil
1 can of tomato sauce
1 cup of red cooking wine
3 cloves of garlic, smashed or chopped
1 TBSP each of: garlic salt, white pepper, dried basil, dried oregano, olive oil
2 servings of pasta of your choice (I like thin spaghetti, myself)
1 cup of cooking wine
cheese
0) Preheat oven to 375
1) Put about half an inch of frying oil in your favorite frying vessel and warm it over medium heat.
2) Mix the egg and water in a bowl to create the Egg Wash Step in your Breading Station.
2.5) Place the flour and Stove Top crumbs in separate containers (small plates are totally fine for this). This completes the Breading Station.
3) Bread the chicken:
- dip in the egg wash
- shake off excess
- dip in the flour
- shake off excess
- dip back in the egg
- dip in the Stove Top crumbs
4) At this point the oil should be hot enough to fry the chicken. Cook approx. five minutes per side.
5) While the chicken cooks, combine the tomato sauce, wine, garlic and spices in a baking dish large enough to hold all the chicken and zucchini.
6) Drain the fried chicken on a plate covered with a paper towel.
7) Quarter the zucchini and slice off enough of the outside so that they can sit basically flat. Repeat the breading and frying steps with the zucchini.
8) Drain the zucchini briefly on the paper towel plate. Add the chicken and zucchini to the baking dish and place the dish in the oven.
9) Set oven timer for 15 minutes.
10) During baking, start boiling the water (plus 1 cup of cooking wine) for the noodles. When the water is boiling, add the noodles (you know the drill).
11) After 15 minutes of baking, add shredded cheese of your choice to the tops of the chicken and zucchini. (I used Parmesan and American. You should use what you like. It's cheese; very hard to go wrong here.) Put back in the oven for another 5 minutes.

12) Remove dish from oven, drain noodles (this timed out really well for me), put on plates and serve. Nom!
How Did it Go?
I'll repeat my 'Nom!' here. I learned from my previous mistakes and it all worked much better. Crispy outsides to the chicken and zucchini, tender juicy insides.
What Would I Do Differently?
Allegedly there's a method for breading things that keeps your hands from getting gloppy. I have soooooo not mastered this. I've heard the "One hand for the dry ingredients, one hand for the wet ingredients" Principle, but I always get stymied at the point where I'm moving the item to be breaded from a wet dish to a dry dish (or vice versa). One hand inevitably winds up both wet and dry and then i just give it all up for lost. So, that's a skill I'd like to look into before my next go at something like this.


Monday, September 13, 2010
Y is for YMCA Hunger Challenge
(you know, while we're hanging out here at the end of the alphabet)
The local YMCA is doing a Hunger Challenge, which I wish I'd heard about sooner. A friend of mine is doing it and keeping track of her experiences. Perhaps I'll ask her if I can re-post.
Tangentially, this is one of my only sadnesses with FaceBook's taking over Blogs. FB is so lock-down-able, that it can be hard to link to cool things going on there.
Anyway.
The gist of it seems to be that you eat off of the same budget as someone living on food stamps - $28 per person per week, according to their calculations - in order to get a feeling for the challenges, etc of that.
I love this idea. I love anything that makes me think more about what I'm eating. Not necessarily in a Life Changing sort of way, because I'm realistic. But at the very least one would go back to one's normal eating habits with a renewed sense of appreciation. Or relief.
So, even though I've missed the official challenge, I may try this on my own later, just for the heck.
For the record, I would also be up for a Gluttony Challenge. You know, like, eat a Microsoft employee's paycheck worth of food in a single week? It'd be very Brewster's Millions, but I think I'm up for it. You know, in case anyone wanted to sponsor me.
Tuesday, September 7, 2010
Z is for Zucchini Chicken Parmigiana
My first time trying this was a FAIL due mainly to 2 things:
1) Following the bad advice of an online recipe that suggested pan frying was not necessary. I blame my laziness for letting me succumb to this ridiculous notion.
2) Not having cheese in the house when I started making it. Grrrr! Couldn't interrupt cooking to run out for cheese so what I made was more Zucchini and Chicken Breaded and Baked in Red Sauce and rather dry.
I'm giving it another go this evening with cheese and frying pan firmly involved. I'll let you know.
Monday, September 6, 2010
Z is for Spinach Zucchini Balls
This falls firmly into the category of Foods That Hide the Zucchini. (That sounds way naughtier than I intended, . . . but note that I do not delete it.)
My friend decided to hold a poker party in honor of her birthday. She asked me to bring some zucchini to grill and also a snack.
Enter the Spinach Balls, a time honored family recipe. First shared with us when my favorite aunt married in, it's my go-to when busting out a savory snack for large group sharing.
Spinach Balls + over abundant zucchini = sneaky deliciousness.
What I Did:
1.5 cups baby spinach, chopped (frozen spinach is also totally ok)
1.5 cups of zucchini, grated
1/2 tsp each of:
garlic salt, white pepper, celery salt, chicken bouillon powder, basil
1 stick of butter
3 shallots
1 clove of garlic
2 cups of Stove Top mix
2 large eggs
1/2 cup parmesan cheese, grated
0) Preheat oven to 350
1) Add spinach, zucchini and spices to a pot.
2) Add enough water to cover veggies.
3) Bring to a boil and then let cook as you proceed with the other steps, stirring occasionally.
4) Chop shallots and garlic and saute in the butter until they are transparent.
5) Turn off veggies and onion/butter pans and allow them to cool.
6) Combine stuffing mix, eggs and cheese in a bowl.
7) Strain water from veggies. Mix veggies into stuffing mix.
8) Mix butter/onion/garlic mixture into stuffing mix.
9) Shape the mix into large marble-sized balls and place on a baking sheet.
10) Bake for 15 minutes.
How Did It Go:
Awesomely. The balls were gone before anything else, several people at the party asked me for the recipe, and no one seemed aware that there was zucchini involved. Win, win and win. Thanks to Aunt Mary, as always, for this no-fail recipe of tastiness.
What Would I Do Differently:
Nothing to make it better, but I think it's fair to point out that this is a very flexible recipe. More/different onions, different cheese, different spices; I've done all these at various times and it's always worked out (and, as suggested, the zucchini is not an original part of this recipe), so feel free to play and substitute. The only thing you can't stint on is the butter. At least, I don't think you can. I've never tried it. If you do, let me know how it goes.
Monday, August 30, 2010
Z is for Zucchini Marinade for Grilling
Since posting yesterday's picture to my FaceBook profile, I've received two requests for zucchini sharing and three recipes. I heart you internet!
***
For me, the easiest way to deal with zucchini is on the grill. It's low fuss and in summer I tend to be grilling a meat for dinner anyway. Grilling zucchini plain totally works, but sometimes I want a little something more to it, which is when I throw together this marinade. Bonus: it works for every other vegetable I've throw at it so far (asparagus, broccoli, green beans) plus also makes a darn good salad dressing.
What I Do:
extra virgin olive oil
balsamic vinegar
dried tarragon
white pepper (feel free to substitute black)
salt
(sorry there aren't real amounts here, but I tend to eyeball based on what I'm using it for)
- preheat your grill*
- mix approx equal parts of the oil and vinegar
- add salt and pepper in equal amounts and roughly twice as much of the tarragon. mix.
- halve the zucchini length-wise and add to the mix
- shake or stir to coat as needed, and let sit for 15 minutes
Grilling time varies. I find a medium sized zucchini (2x9 inches) times out pretty well with pork chops (1 inch or so thick), but you know your grill better than I do. Speaking of which:
*Yes, I use a propane grill. If it makes you feel better, I'm ready to admit the superiority of charcoal. Gas is just more practical on a night-to-night basis.
Z is for Oh my god, so much Zucchini

And this isn't counting the bigger one I grilled for dinner. Or the two more already lurking out there in the garden.
Doomed. I am doomed.
Sunday, August 29, 2010
D is for Detour
Ok, . . . guys? It's the end of August and I'm drowning in zucchini. In the interest of actually blogging here again, I hope you'll be tolerant of my skipping ahead a bit and letting you know how I'm dealing with the squash overload. Because I'm looking at pickling and, frankly, I'm a little scared.
Wednesday, August 18, 2010
D is for Delayed Duck
Remember that frozen duck? The one from five months ago? That one?
Yeah. What can I say? It's been a busy busy spring/early summer.
So let's jump in the wayback machine, and travel back to a more innocent time: Late March, when the duck finally thawed.
I did the google thang per usual, and read recipes from Food Network, Epicurious and Cooks dot com, besides consulting my perennial favorite for large poultry roasting, The Joy of Cooking.
The big concerns in duck roasting seem to be
a) getting rid of the fat, because there is apparently a lot of it, and
b) avoiding "off-flavors" (I'm assuming they mean "gaminess" here...?)
Some people also seem to really, really long for an extra crispy duck skin. However, since this was my first duck, I wasn't going to push myself too hard.
What I Did:
one duck, fresh or thawed
salt
pepper
shallot
0.5) Preheat oven to 450 degrees
1) Rinse duck and pat dry
2) Place duck, breast up, on a rack in a shallow baking pan
3) Score the duck:
- make a series of shallow, diagonal cuts along one side of the bird torso
- "shallow" in this case means you should cut through the skin, but not the fat
- cut along the duck on the other diagonal, creating a diamond pattern.
- repeat on the other side of the torso
4) Rub the duck inside and out with salt and pepper (you could go with herbs here as well, I imagine)
5) Put a shallot inside the duck cavity (the recipes inform me that citrus fruits, root veggies, etc, would work just as well for this)
6) Place pan and duck in the oven
7) Reduce the temperature immediately to 350
8) Cook 20 minutes per pound of bird
9) Remove from oven
10) Allow to rest for ten-ish minutes, discard shallot from cavity, carve and serve
How Did it Go?
Great! The duck was juicy but not greasy, the flavor was mild, and life was good. It is fair to note here that Mr. Husband found the taste a bit odder than I did, so duck is not likely to become a household staple.
What Would I Do Differently?
Blog about it in a more timely manner. :-p Sorry about that, y'all.
Wednesday, March 31, 2010
C is for Canned Pancake Batter
Oh yes I did.

I was watching Unwrapped on the Food Network, an episode loosely themed around "unusual containers". The push up sushi triggered a light gag reflex, but Batter Blaster (organic!) excited me a whole lot. (Beware the theme song if you follow the link.)
It took me a few tries to locate Batter Blaster at my local supergrocery, mostly because I couldn't for the life of me figure out where in the store it was likely to be (cheesy dairy case, as it happened). Once found, however, it was everything I hoped it would be: Fast, easy to use and the pancakes taste normal, ie delicious. They were slightly less fluffy than scratch pancakes, but not by a lot.
The can informs me that I can also use this wonderful product for waffles (heart!). I'll try that next weekend and report back.
Tuesday, March 23, 2010
D is for Duck
Duck achieved!
It turned out all I needed to do was ask someone in the meat department. Fancy that. They led me across the store to the freezer case and, et voila, I now have a duck.
Of course, I have no idea what I'm going to do with said duck yet, but, well, it's frozen solid, so I figure i have a couple days to make a plan.
Tuesday, February 2, 2010
C is for Lamb Shanks with Cranberries
I wanted to come up with a savory cranberry recipe, errr, just because, so I started by thinking about what kinds of meat would be able to stand up to that. I decided lamb or duck might be good bets, since they have intense flavour, so I bopped over to the store.
Duck = Fail, so lamb won by default, which was not a bummer of any sort for me, since I love lamb. But I'd never cooked it before, so the adventurous-ness level of this undertaking cranked way up. Add on the experience of My First Reduction Sauce and I had a lot of fun with this one.
I consulted the recipe on the lamb package plus this one from AllRecipes.com before jumping in.
What I Did:
2 lamb shanks
salt
white pepper
2 Tablespoons olive oil
5 cloves of garlic
2 shallots, chopped
2 cups fresh cranberries
2 cups chopped carrots
2 cups chopped zucchini
approx. 1 cup each of
- beef broth
- chicken broth
- red wine
- white wine
1 Tblspn dry rosemary
1 Tblspn dry thyme
1 Tblspn dry mint
dash of cranberry juice
1) Heat oil in a skillet over medium high heat and sprinkle shanks with salt and pepper.
2) Cook lamb shanks until brown on all sides and remove to plate.
3) Add garlic, shallots, cranberries, carrots and zucchini to skillet and saute for 5-10 minutes.
4) Stir broth, wine, rosemary, thyme and mint into skillet.
5) Place lamb shanks in a crockpot and pour the skillet contents over them. The liquid should cover the shanks, so if it doesn't, add more both and/or wine until they are covered.

6) Leave everything in the crockpot on high for 3 hours.
7) Pour 2-4 ladles worth of the cooking liquid back into the sautéing skillet over low heat. It's ok if you catch some of the cranberries here as well.
7.5) Leave the lid off the crockpot, but the heat on.
8) Add cranberry juice to the skillet to taste.
9) Simmer until the liquid has reduced by half.
10) Split the veggies and shanks onto two plates and drizzle with the reduction sauce. Serve with starch of your choice if so inclined.

How Did it Go?
Great! Holy cow, lamb is as easy to cook as pot roast. Now, if it were only similar price-wise, I could all but give up beef. Well, not steak. Yum.
What would I do differently?
Um, for once, nothing. Made more shanks so I could've had leftovers?
Monday, February 1, 2010
D is for ?
Hey there, food fans.
I'm working on hunt-and-pecking up my fourth and final recipe for C and am at a bit of a loss for what ingredient to play with for D.
May I ask for your suggestions?
I'm working on hunt-and-pecking up my fourth and final recipe for C and am at a bit of a loss for what ingredient to play with for D.
May I ask for your suggestions?
Tuesday, January 26, 2010
C is for Cranberry-Blueberry Muffins
I've made muffins from a mix before but never from scratch. My bag of dried cranberries (plus a bag of dried blueberries that I'm looking to use up because I find them too sweet) inspired me to give it a go.
The muffin base recipe is mostly from Joy of Cooking. I went my own way with the mix-ins treatment.

What I Did:
1/2 cup dried cranberries
1/2 cup dried blueberries
white wine (enough to cover fruit)
1 3/4 cups all purpose flour
3/4 teaspoon salt
1/4 cup sugar
2 teaspoons baking powder
2 eggs
2 Tablespoons melted butter
3/4 cup milk
0) Preheat oven to 400
0.5) Soak the dried fruit in the wine for an hour or so. (This is also called macerating, if you want the five dollar word).
1) Sift together flour, salt, sugar and baking powder.
2) Drain the dried fruit.
3) Beat the eggs until mixed.
4) Mix melted butter and milk into the beaten eggs.
5) Mix the dry ingredients into the wet ingredients in as few strokes as possible. The batter will be lumpy.
6) When the dry ingredients are almost completely moist, add the fruit and finish mixing.
7) Either grease your muffin pans or line them with cupcake cups and fill them up approximately 2/3 full with batter. (I just use a big spoon for this.)
8) Bake for 20-25 minutes. Yields 20ish muffins.
How'd it Go?
Not bad. The texture was really good. And the flavor was good, except…they just weren't as sweet as I'm looking for in a breakfast muffin. If these had been muffins intended to go along with stew, they would've been perfect.
What Would I Change?
~ More sugar! (Inside and on the top.)
Tuesday, January 12, 2010
Cranberries Achieved!
Found fresh cranberries at the Ballard Market. Hurray!
Tried one in its natural form. Unbelievably tart!
Tried one in its natural form. Unbelievably tart!
Saturday, January 9, 2010
C is for Cranberries?
I'm a little stalled out in C by being unable to find fresh cranberries in my usual grocery stores. Apparently those are only a Christmas food. I'll keep working on it, but in the meantime need to adjust plans to use Craisins and/or cranberry juice.
Stay tuned.....
Stay tuned.....
Sunday, January 3, 2010
C is for Cranberry Bread Pudding
We host an Orphan's Thanksgiving every year, potluck-style, so each Black Friday finds me with some ingredients in my kitchen that wouldn't normally be there. I enjoy this, because it gives me a chance to play, but I was initially perplexed by this year's leftover Can of Gelled Cranberry Loaf. Fortunately the delicious loaf of day-old home baked bread inspired me:

(As usual, I researched a couple of recipes online before starting.)
Here's What I Did:
- Pudding -
1/2 can of cranberry gel stuff
1 box of non-instant Flan (4 servings)
2 cups of cold milk
1 loaf of dry bread
- Sauce -
1/2 can of cranberry gel stuff
vodka
confectioner's sugar
- Whipped Cream -
whipping cream
confectioner's sugar
(optional, because I will not judge you if you prefer Cool Whip or spray whip cream. I only made this because I had the cream handy)
0) Preheat over to 350 degrees
1) Put 1/2 of cranberry gel in a small saucepan and add the milk.
2) Over low heat, whisk together until mostly combined.
3) Whisk in flan powder until combined.
4) Turn the heat up to low medium and bring to a boil, stirring frequently.
5) While waiting for the pudding to boil, butter the sides of a small loaf pan.
6) Break down the loaf of bread into bite-size chunks and place in the loaf pan.
7) Once the pudding has reached a boil, pour it over the bread chunks.
8) Bake for 45-60 minutes.

9) Place the other half of the gel in another small saucepan.
10) Over low heat, add confectioners sugar and vodka to taste (I wound up using about a 1/4 cup of each), stirring constantly.
11) Bring it to a boil and boil for about a minute, stirring frantically.
Optional 12) Beat 1 cup of cream in a cold bowl.
Optional 12.5) As cream starts to stiffen, add confectioner's sugar to taste
13) Serve pudding in slices, liberally covered in sauce and cream.

How'd It Go?
Surprisingly well, considering I've never, ever made bread pudding before. I felt like the pudding absorption was kind of inconsistent, so the texture varied throughout the slice in a way I didn't love, but it was definitely tasty. And the sauce was deemed awesome by Mr. Husband.
What Would I Change?
- I think a vanilla pudding might have gone a little better with the cranberries than the flan.
- More of the pudding probably would've solved my texture issue, so next time I'll kick it up to the 6 serving sized box.
Saturday, January 2, 2010
C is for Chairman
Having quit my job almost a month ago (due to a lying, dishonorable boss plus an abusive co-worker), naturally I'm looking around for new employment.
A friend told me that one of the first questions she always asks an interviewee is "What is your dream job?"
"Easy," I replied. "I want to be The Chairman on Iron Chef."
You get to wear nice clothes, hang out with Alton Brown and eat really good interesting food. Your every move is foleyed (swoosh! whoop!) and you don't even have to judge.
All this plus a paycheck? Sign me up!
Friday, January 1, 2010
C is for Cranberry Champagne Cocktail
One of the nicer duties of my former job involved specialing up Opening Night of each show with cocktails. This is the one I used for the Christmas show in 2008 (I _almost_ said last year there, yes):
What I Did:
1 part white champagne
1 part pink champagne
1 part cranberry juice
some fresh cranberries (2 or 3 per glass)
- combine and serve in a champagne glass (if you have them)
Simple yet tasty, festive, and popular with the people. Happy New Year, folks!
What I Did:
1 part white champagne
1 part pink champagne
1 part cranberry juice
some fresh cranberries (2 or 3 per glass)
- combine and serve in a champagne glass (if you have them)
Simple yet tasty, festive, and popular with the people. Happy New Year, folks!
Subscribe to:
Posts (Atom)